One day, you noticed that your window tint has started bubbling, turning purple around the edges, or maybe that it’s darker than what your state allows. Whatever the reason, you’re now staring at your car windows thinking, “How do I get rid of it without making things worse?”
If you want to know how to remove tint from car windows, you’ve come to the right place.
This blog walks you through why tint gets removed in the first place, the risks of doing it wrong, a step-by-step DIY approach, and the alternative methods worth knowing about.
Why People Remove Window Tint (Fading, Bubbles, Legal Issues)
Tint doesn’t last forever, and when it starts to go, it really goes. Fading, bubbling, and that telltale purple haze are the most common signs that your film has broken down, usually from prolonged UV exposure. Some people remove it simply because they bought a used car and the previous owner’s tint job was, frankly, terrible.
Then there’s the legal side. Because many states have specific laws about how dark car window tinting can be, and not everyone who gets tinted windows double-checks those rules first. Getting pulled over for illegal tint gets old fast.
How Long Does Window Tint Last?
Quality tint, professionally installed, can last anywhere from 5 to 10 years, depending on the film type and the climate where you live. Cheaper films, though, last maybe 3 years before they start looking rough. And dyed films tend to fade faster than carbon or ceramic options.
Heat and direct sun accelerate the breakdown significantly. Something worth knowing before you assume your tint is fine just because it’s “only a few years old.”
Risks of Improper Tint Removal (Glass Damage, Residue, Scratches)
Here’s where people get stuck: going at your windows with a razor blade without preparation is how you get scratched glass. And even if you peel the film off cleanly, the adhesive it leaves behind is a whole other issue. That sticky residue attracts dirt, smears when you clean it, and can be genuinely difficult to remove without the right products.
Rear windows are especially tricky because of the defroster lines embedded in the glass. Aggressive scraping can permanently damage those lines. Tinting auto windows is easy; removal is where the real patience is required.
DIY Window Tint Removal: Step-by-Step Guide
Tools & Materials Needed
Before you start, gather everything. You don’t want to stop halfway because you’re missing something.
- Steamer or Heat Gun – softens the adhesive so the film lifts more cleanly
- Razor Blade or Utility Knife – for getting under the edge of the film
- Ammonia or Adhesive Remover – essential for the residue step
- Soapy Water – keeps the surface slick and reduces scratching
- Protective Gloves & Safety Glasses – especially if you’re working with ammonia
Preparing Your Workspace (Safety Tips & Precautions)
Work in a shaded area or indoors if possible. Direct sun causes the film to heat up unevenly and can make it tear into smaller pieces rather than peel into larger sheets. If you’re using ammonia-based products, make sure you have ventilation. That stuff is strong.
Step 1: Loosening the Tint Film (Using Steam or Heat Gun)
Apply heat evenly across the window using a steamer or heat gun held a few inches from the glass. Move it slowly and don’t focus on one spot for too long, especially near the defroster lines. The goal is to soften the adhesive underneath, not cook the glass. A steamer is generally gentler and more forgiving than a heat gun for beginners.
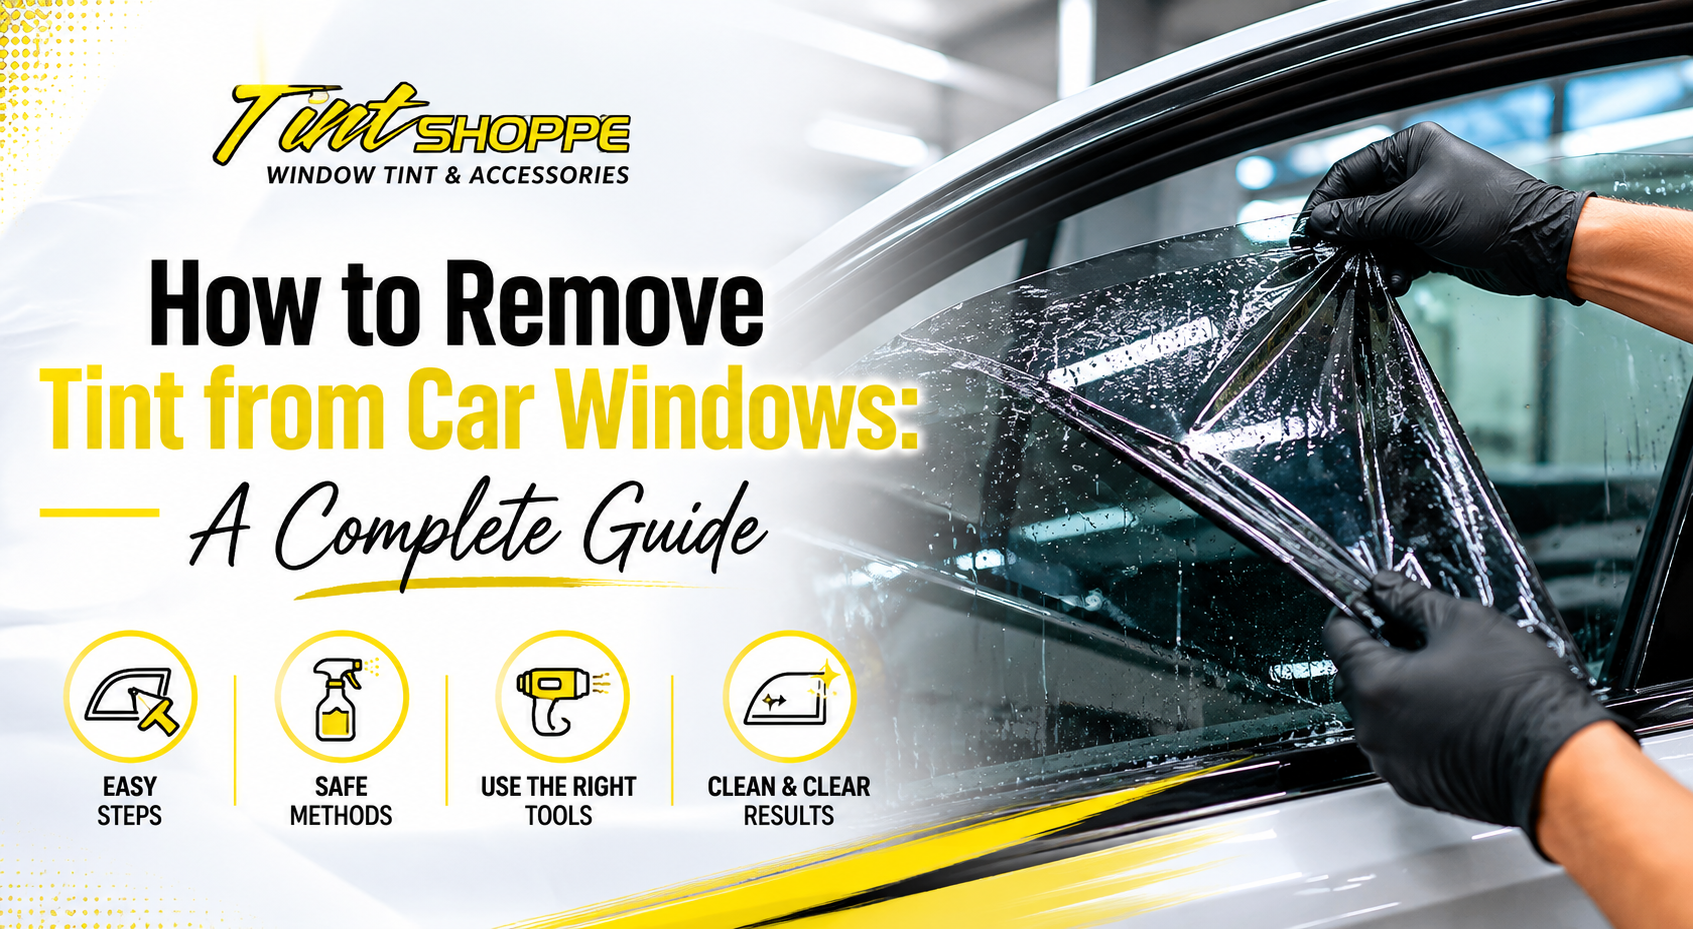
Step 2: Peeling Off the Film Properly
Start at a corner, usually a lower corner works best. Use your fingernail or a razor blade at a very low angle to lift the edge, then peel slowly and steadily. The slower you go, the more likely the film comes off in one large piece. Rushing almost always results in the film shredding into strips, which multiplies the work.
Step 3: Removing Adhesive Residue (Alcohol, Soapy Water, Adhesive Removers)
Once the film is off, the adhesive stays behind. Apply a small amount of adhesive remover or rubbing alcohol to a clean cloth and work in small sections. For tinting auto windows, specifically, products like Goo Gone or commercial adhesive removers work well. Soapy water can help loosen lighter residue and always keep the surface slightly wet.
Step 4: Cleaning the Window for a Spotless Finish
Finish with a proper glass cleaner and a microfiber cloth. This removes all chemical residue, leaving the glass clean and clear. Be sure to check from multiple angles in different lighting, because adhesive residue has a way of tricking you.
Hair Dryer vs. Steamer: Which One is More Effective?
A hair dryer technically works, but it’s slower and less consistent than a steamer. It doesn’t generate the same level of concentrated heat and moisture that makes film peel cleanly. A steamer is a better tool. That said, if a hair dryer is all you have and the tint is relatively new, it can still get the job done, just needs more effort.
Using Ammonia & Black Trash Bag for Easy Removal
This method involves spraying the tinted window with an ammonia solution, then covering it with a black trash bag, cut flat, to trap heat from the sun. Leave it for an hour or two on a warm day, and the adhesive softens enough to peel the film fairly easily. It’s an easy approach, though it takes patience and the right weather conditions to work well.
Window tinting for cars done with older, dye-based films tends to respond especially well to this method because the adhesives in those films break down more readily with heat.
Razor Blade & Soapy Water: A Precise Method
Wetting the glass with soapy water and using a fresh razor blade at a low angle is probably the most controlled approach. It’s slow, but you have good visibility and control. Keep the blade angle shallow; it avoids scratching. And replace the blade often; a dull blade drags and scratches.
Pros & Cons of Each Method
| Method | Speed | Safety | Effectiveness |
| Steamer | Moderate | High | High |
| Hair Dryer | Slow | High | Moderate |
| Ammonia + Trash Bag | Slow | Moderate | High |
| Razor + Soapy Water | Slow | Moderate | High |
None of these is perfect. The ammonia method is great for large windows, but awkward on curved glass. Steamers are effective but require renting or buying equipment. The razor method gives you precision but is labor-intensive.
Bottom Line
How to remove tint from car windows at home is genuinely doable, but it requires patience, the right tools, and a willingness to take your time with the adhesive step. Most people underestimate that part.
If the tint is old, heavily bubbled, or stuck to the rear defroster lines, professional tint removal is worth the extra cost. A professional can handle stubborn film without risking your glass or defroster grid.
If you’re in the area and searching for window tinting near me, or you need clean tinted windows work done after removal, it’s worth consulting a professional shop before you dive into a DIY project on a car you care about.
How to remove tint from car windows successfully often comes down to one thing: not rushing. Take it slow, use heat consistently, and don’t skip the adhesive removal step. If at any point it feels like the glass is at risk, stop and call in a pro.
For clean, precision work and advice you can trust, professional tint removal from a certified shop is the smartest route, especially for rear windows and newer vehicles.
Ready to Get Professional Help?
At the Tint Shoppe, we make car windows tinting and removal simple, clean, and stress-free. Whether you’re dealing with old, bubbling film or want a fresh, high-quality tint installed after removal, our team handles it all with precision. Don’t risk your glass or defroster lines with a rushed DIY job.
Contact us at (703) 491-8300 today for expert removal and tinting services you can trust. Your windows deserve better, and so does your time.
FAQs
1. When to Choose Professional Window Tint Removal
If the tint is severely aged, bonded to defroster lines, or if you’ve already attempted removal and made things worse, professional removal is the safer call.
2. Cost of Professional Tint Removal – Is It Worth It?
Typically ranges from $25 to $200 per window, depending on film age, vehicle type, and location. For most people, it’s worth it on rear windows at a minimum.
3. How Experts Remove Window Tint Safely & Quickly
Professionals use commercial steamers, specialized adhesive solvents, and non-abrasive tools that minimize risk to both the glass and the defroster grid.
4. Choosing the Best Window Tint Removal Service Near You
Look for shops that specialize in car window tinting and removal, check reviews, and ask whether they guarantee no damage to defroster lines.
5. Preventing Common Mistakes & FAQs on Window Tint Removal
The most common mistakes are using too much razor blade pressure, skipping the heat step, and not fully removing the adhesive before cleaning.
6. Can You Remove Window Tint Without Damaging Defrosters?
Yes, but it requires care. Use a steamer rather than a razor on the rear window, and always peel in the direction of the defroster lines, not across them.
7. How to Remove Old, Stubborn Tint Film?
Old film often requires longer heat exposure and a two-stage approach, ammonia to break down the adhesive, followed by careful peeling and a second round of adhesive remover.
8. Will DIY Tint Removal Void My Warranty?
It depends on your vehicle warranty and the nature of any damage caused. If your car is still under the manufacturer’s warranty, consult your dealership before attempting to remove the tint yourself; accidental damage to defrosters or glass may not be covered.